Thursday, December 31, 2020

EUGENE TRACK THROAT REARRANGEMENT - 1

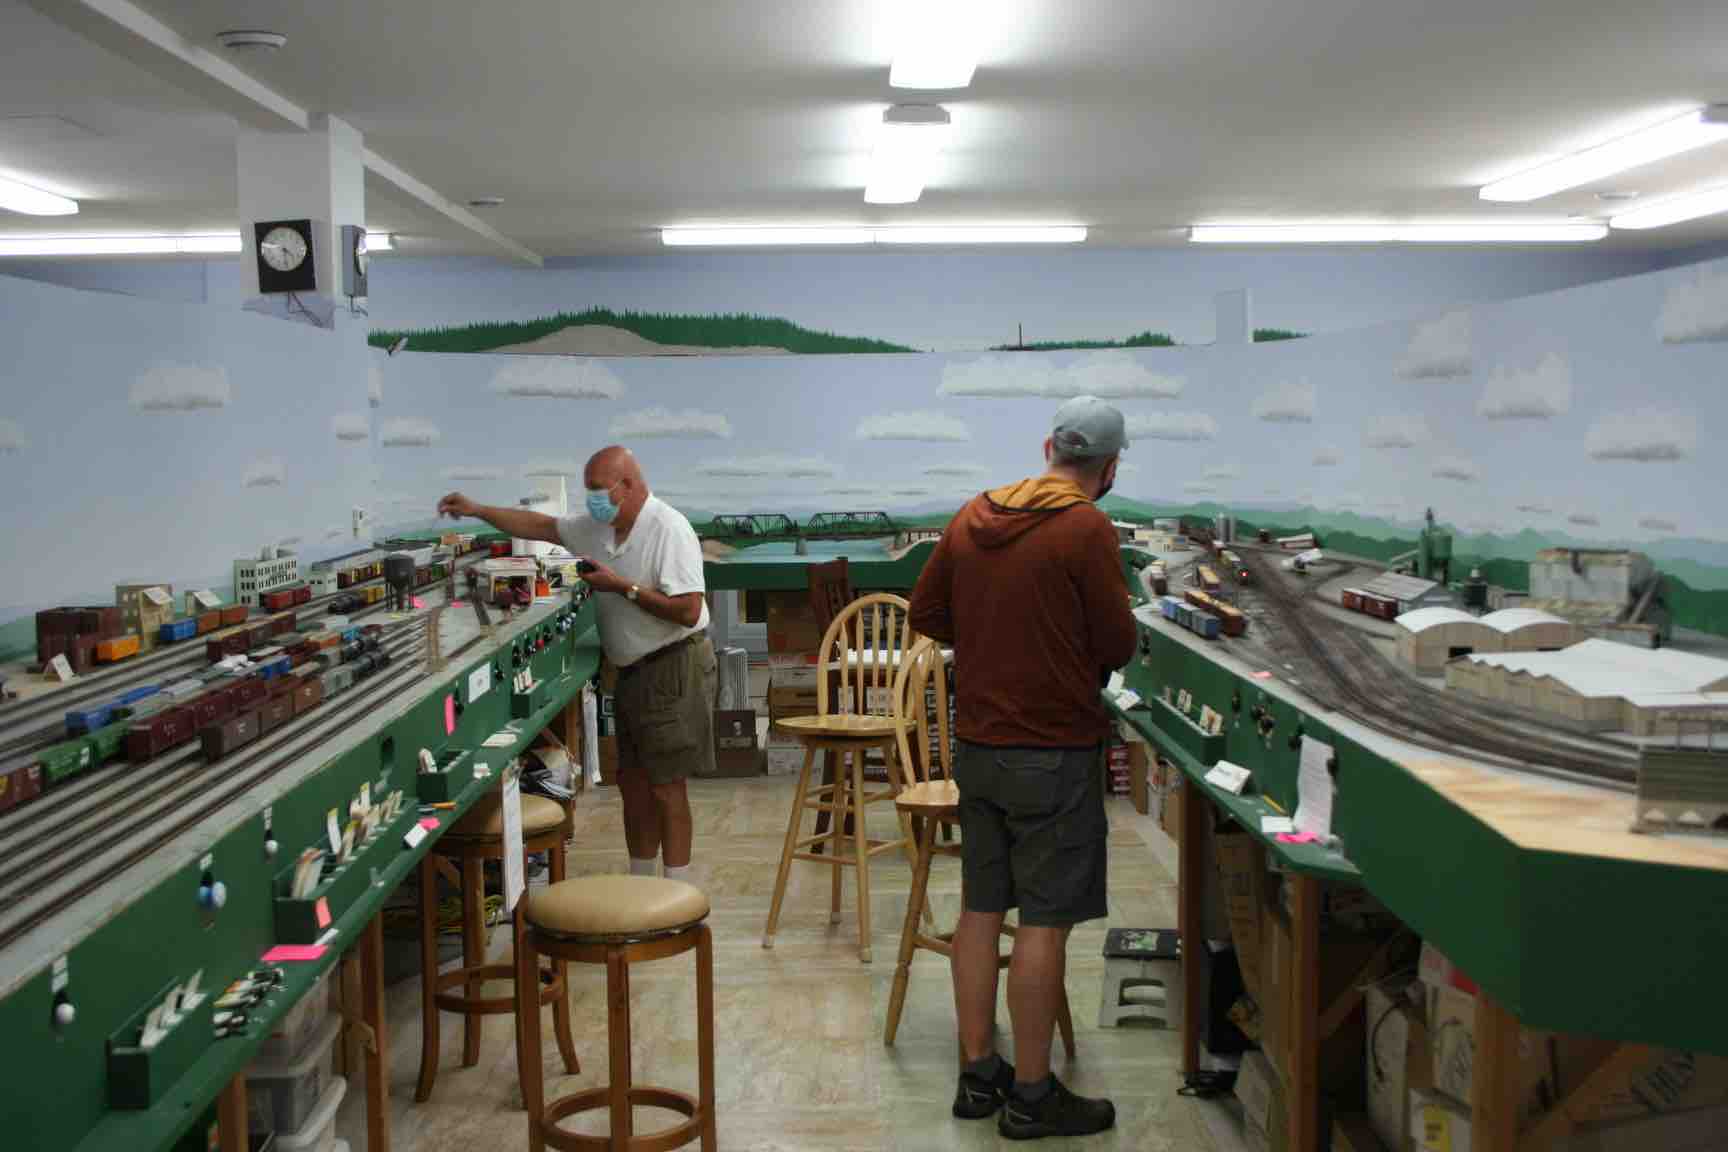
As we moved into the Fall and Winter, I faced a period of shut-down on my railroad.  Poor weather precludes using our back patio as a safe gathering place and relief valve where masks can be removed while maintaining distance.  With a long period without operating sessions, I can tackle larger projects that would otherwise disrupt the railroad.  Such is the case with the long-planned rework of the track arrangement at the RR-East end of the Eugene Depot aimed at extending a second track from the depot into the arrival-departure yard.


The Eugene Depot track rework was suggested to me by two of my retired SP railroaders at the first full operating session back in June 2015.  In a flash, their comments revealed to me the importance of two tracks running the full length of the Eugene yard complex, something I had missed in well over a decade of staring at the yard track diagram drawn by Ed Austin in his and Tom Dill's The Southern Pacific in Oregon, Pacific Fast Mail, Edmonds, Washington, 1987.  Two tracks with suitable cross-overs kept the terminal fluid from the RR-West switch at the depot north to Irving at the RR-East end of the Eugene Yard.  I planned and built my railroad to neck back down to a single main track at the RR-East end of the depot before arriving at the throat switch for my reverse loop staging which serves as the arrival-departure yard.


While I recognized the need to "extend the WP Siding" as Tom Dill so simply put it, the solution required complex track-work.  Whatever I did needed to fit within tight geometry created by the original track plan and construction.  I very quickly settled on a plan involving double slip switches.  I already had a short section of two tracks around the reverse loop throat switch, but I needed to deal with track and switches that were part of the Eugene Depot complex.  


My initial plan would use FastTracks turnout construction fixtures just as most of the simple turnouts on my railroad have.  I eventually discovered that my intended use of Number 8 double slips to replace existing simple Number 8s that were in the mainline tracks in this area would not work.  That size double slip is a lot more complex than simply multiple sets of points and frogs.  When I understood that, I began looking at commercial double slip switches.  I finally settled on Peco SL-U8363 #6 Double Slip switches.  As I worked with these sharper crossing-angle (#6 vs #8 frogs), I found my original track-laying was sufficiently imprecise to adapt to the Number 6 frog angle.  My "prototype" (first use) installation was with a single double slip switch installed into the departure end of the arrival-departure yard.  That was documented this summer in my post: https://espeecascades.blogspot.com/2020/07/eugene-arrival-departure-yard-track.html

That installation established access to all twelve A-D Yard tracks instead of the original design which accessed only the outer five tracks.  


The three small group gatherings and operating sessions I held this summer tested that initial double slip switch installation.  That was a critical milestone.  I long ago learned that one cannot proof read one's own writing nor properly test a new creation such as track-work.  With that test successfully passed, it was time to schedule the actual track installation.


The actual track re-work proceeded fairly quickly in October following my third and last small group session.  I removed the old track and switch machines and cleaned up the roadbed, including filling throw-bar slots.  Five switches came out, including one that access a future industrial area.  The new track went in fairly smoothly although I had undercounted the number of double slip switches I needed.  They were out of stock at the usual suppliers, but a quick internet search yielded one from Yankee Dabbler: https://yankeedabbler.com/  Their service was excellent.  I also found I was running out of Code 83 track and was able to obtain a bundle of the required Micro Engineering flex track from a favorite Portland hobby shop, Hobby Smith:

https://www.hobbysmith.com/.  In both cases, I paid for express shipping as I already removed the old track.  My railroad was un-runnable!


Revised track for the RR-East end of the Eugene Depot.  The track on the left in the foreground was added, extending the WP Siding which is the track closest to the depot, seen in the distance.  Common to SP practice, the official mainline track is at least one track over from the depot.  I need to add the passenger platform and walk-overs at the depot.  Also seen is the now straight-through track path from the pair of "City Yard" tracks (to the right of the WP Siding and Main) that accesses the to-be-developed industrial area in the lower left.


With the track arranged and throw-bar slots cut, I moved on to installing Tortoise (by Circuitron) switch machines.  "Murphy's Law" was in full force as I discovered two of the throw-bar slots were alongside bench-work stringers.  I had very little margin to work with as the switch positions were fixed by the tracks they connected to.  Fortunately, I was able to cut the throw-bar slots just beyond the underlying stringers by careful selection of which throw-bar hole I would use.  I bent an additional jog in the throw rods for those two switch machines, providing a little more room for the machines away from the bench-work stringers.  


At this point I should note why this project has taken so long.  After all, I rapidly installed many more switches and switch machines in short time during my original layout construction.  First, I am five or six years older than I was then.  It is remarkable what the impact has been on my flexibility in that time.  This was compounded by needing to work in very tight quarters.  That photo above of the track-work should give a hint.  The backdrop is the basement wall.  Another factor that took a while to recognize its impact was the cataract eye surgery I had a year ago.  When I did the major layout construction, my nearly life-long near-sightedness led to my removing glasses for under-layout wiring and finding everything within arm-reach was in focus.  Now I need reading glasses or other vision aids in that range.  It took a while to find the right focal correction for this work underneath.


Sitting on the floor, working on layout wiring for the new track.  I am wearing the 2.0 diopter correction glasses I eventually found were required for this work.


This project has drawn out for a very long time, totally consuming my focus and whatever energy I could muster throughout the Fall.  The next major step involves running cables back from the nine switch machines in the current installation to a new control panel that muct be designed and built.  Eventually, the panel will be converted to route-control push-buttons, but the toggle switches plus LED route indicators I pioneered on the first double slip switch installation will have to suffice for a while.

Tuesday, October 20, 2020

SCALE HOUSE AT EUGENE

As I worked on a nearby track project at the RR-East end of Eugene, I kept bumping over a loose track intended for the scale house at Eugene.  It was past time to deal with this simple project!


Railroads charge for most freight on a weight basis.  They negotiate various methods of computing or providing the shipment weight with many customers, but some loads simply need to be weighed.  Most railroad yards of any significance have a scale track.  The scale can be used to determine the empty weight of cars just shopped and to weigh loaded cars as needed.  Fairbanks Morse was a major scale manufacturer and their scales often used standardized plans for the scale house.  


A few years ago, Walthers produced a kit for a pair of track scales, 933-3199.  This kit provides a pair of scale houses and representations of two types of track scales and coverings.  The scale house is a simple assembly job.  I spent more time painting than assembly.  I chose the older style scale covering which was used with a dedicated scale track.  The other base features track stand-offs on a "concrete" base intended for closely parallel tracks (about a foot between centerlines) for the scale track and its by-pass.  Similarly, the scale houses include one with a peaked roof which I used and one with a flatter roof.


Scale house installed at the RR-East end of my Eugene classification yard.


My scale installation at the RR-East end of my Eugene classification yard includes a straight run-around track and a separate scale track.  That latter track was left loose for the past five years as I needed to decide which scale base to use.  After years of thinking I would use the concrete base with stand-offs, I finally realized I already made that choice when I laid out the separate scale track.  With that settled, it was easy to proceed--at last!


The scale track is the curved track on the far right in this view of the RR-East end of my Eugene Classification Yard.


I quickly assembled the scale house with a peaked roof and then set about painting it into standard Southern Pacific company structure colors.  As with my recent effort with the Eugene freight house, I used TruColor paint.  I first used white paint for the window mullions.  The windows were masked and I applied Tamiya fine surface primer.  Next came TruColor TCP-153 SP Colonial Yellow paint.  The roof was painted my variation of Moss Green, wherein I lighten the TruColor TCP-154  with white paint at about a 4:1 ratio.  Finally, I masked and painted the window and door trim.  I used TruColor TCP-163 for the light brown trim.  Although I used a fresh bottle and was able to spray the brown trim this time, touch up (almost always needed for trim!) proved difficult as some of the trim brown paint flaked off of the yellow paint underneath.  After two serious tries with the TruColor SP Depot Trim Brown, I am about ready to give up any further attempts with this paint for the trim.  


A Cotton Belt lumber boxcar= is getting weighed at the new scale house installation.


The track scales feature "wood" planks surrounded by concrete curbing.  I began with a couple of spray paint overcoats I use for wood loading docks.  I then used multiple washes with thinned acrylic paint in tan, gray, "railroad tie brown," and black.  As usual with this sort of wood planking effect, multiple washes are needed to achieve the desired finish.  I will now add some car card tags to designate cars to be weighed as they pass through the Eugene Yard.


Scale house and scale coverings.  


The scale house is finally done.  The track has been installed permanently--no more loose track getting caught by sleeves or simply knocked out of place.  The scale house clearly indicates the function of the track immediately in front of it, so I should no longer find the yard crew parking the RR-East switcher on the scale track!  As I noted, this was a simple project that waited all too long for completion.  

Monday, October 5, 2020

PANDEMIC LIMITED OPERATIONS

As we enter the seventh month dealing with the worldwide Pandemic (and longer since it first entered humans), we gradually are learning how to conduct limited activities while maintaining health safety.  A casualty of the initial wave of societal shut-down was the portion of the model railroad hobby devoted to routine operations.  That activity necessarily involves several people in close proximity--conditions ripe for virus spread.  Still, we are social animals so a way needed to be found to interact in a safe fashion.  

 Model railroad technical activities moved to computer on-line meetings.  Some of these have been quite well organized and conducted, others demonstrated a need to learn and improve.  For the operating part of the hobby, though, we needed to find a different solution.  Some have found ways to engage on-line, using internet connections.  I chose not go that route, staying with my conventional radio throttles.  


What developed in my area over the summer has been a series of outdoor gatherings for "Show and Tell."  My version of this spent an hour or two on my back patio showing off the fruits of model work done during the shut-down and general discussion--all done with distance protocols observed augmented by face-masks.  We then entered my basement layout space (well ventilated) for limited operations.  My first couple of such sessions had very small groups of four or five of us.  My latest session had a larger group of eight.


As with my initial small group sessions, we began on the back patio for "Show and Tell" and general discussion.  This is an important part of the social side of the hobby.  Other than eating or drinking, all remained masked, with distance always maintained.  We then entered the basement to operate the railroad.  Masks were required at all times when indoors and distance maintained as much as possible.


Operations return to my railroad as we continue to deal with community health guidelines.  It was great to see traffic rolling over Salt Creek Trestle again!


I designed my railroad with ample people space.  In particular, the main operating aisle between Eugene and Springfield is six to eight feet wide.  Other aisles are three feet wide or broader, with careful thought about the people flow.  Indeed, the aisle between the Oakridge-Westfir area and the main mountain sidings is six feet wide, but separated into two three feet wide aisles, with one of those on a platform.  This helps my operating crew maintain distance as they go about working their trains.


Another aspect of my layout design was that I planned for "satisfying" operations by a crew of only six. My normal full crew is 16-20, but a small crew of six can perform samples of all operating functions.  I never imagined that a health scare would force me to test that design aspect, but here it is.


My first two limited operating sessions sampled some of the operating roles, with yard operations, local freight operations and some mainline running conducted.  Those sessions worked the initial trains of a "standard" lineup similar to former full sessions.  The latest session worked much more of that line-up.  We worked about half of the trains on the line-up over a two-hour period.  


My limited sessions all use single-man crews, in contrast to my normal use of two-man crews on all of the locals and some of the through freights. Road crewmen used two throttles when they inserted the mid-train helpers to climb to Cascade Summit.  Most helper locomotive sets were returned to Oakridge on the point of the next RR-East train.  The yard crew was thinned out to just a Eugene Yardmaster and a Santa Clara Tower operator.  Both of these functions usually use additional crew members in more congested operations.  None of my sessions have used a Dispatcher--so far--but that will change as I gain experience with planning for limited operations and recruit ten-man crews.  Current Oregon State health guidelines cap indoor "social" activities at ten, so I will plan operations around that crew size.


Craig P. has tucked a light helper set into the house track at McCredie Springs as a following RR-East trains is about to meet a RR-West working uphill.


So far, my yard crews have kept up with classification requirements and other switching work on the railroad.  The reduced number of road crews helps relieve pressure on the yard activity.  The yard crews have been able to support the local freights with one or two originating in each of the small group sessions.  


Rick A. works the Eugene classification yard (left) while Dave H. works the Springfield-B local on the other side of this major operating aisle.


Mark K. organizes his train and the work for the Oakridge Turn. The Oakridge Turn has had at least some work done in each of the three small group sessions held so far.


While the classification yard and locals did their work, trains ran over the full mainline.  With three crewmen available in the most recent session, quite a bit of traffic was moved.  The crews used "smoke signals" to coordinate their moves, planning their meets by quick conversation.  A key aspect of this was that all crewmembers are experienced with my railroad and knew where possible meet locations were, how long it usually took to move between sidings, and the normal use of those sidings. 


Craig L. brings his RR-East train downhill past Eagle Creek and toward a meet at McCredie Springs.


Rodger C. added a mid-train helper at Oakridge and is now working his train uphill in the "Pryor" area and past Montieth (Rooster) Rock.  He will meet the RR-eastbound light helpers and the RR-East road freight at McCredie Springs, just around the corner.


Rodger C. is picking up another through train from the Eugene Arrival/Departure Yard.  In the background, Santa Clara Tower Operator Scott B. is working with locomotives in the engine facility.


It was great to see my railroad return to some semblance of operations.  While I did the primary re-staging for the first session in early August, the most recent session required a very thorough scrub of the rails to clean them.  Disuse and possible film haze left on the rails from recent forest fire smoke left the railroad in poor electrical contact condition. The larger crew of the most recent session points to a way to exercise the railroad while maintaining health safety protocols.  This may well be the way we enjoy this aspect of the model railroad hobby for some time.  The sparkling eyes behind masked faces (couldn't see the smiles) clearly indicates this crew is ready for more!


Wednesday, September 30, 2020

NESTE RESINS - CHEMBOND -- 3

I struggled over the past couple of months to add to my model of the Neste Resins (Chembond) wood chemicals plant.  Previous posts are at:  

https://espeecascades.blogspot.com/2020/06/neste-resins-chembond-1.html

https://espeecascades.blogspot.com/2020/08/neste-resins-chembond-2.html

Even my usual discipline, including list making and a semi-regular blog posting schedule could not lift me out of a funk.  I clearly needed a break and likely a change of focus.  More on that at the bottom of this post, but for now I at last can report adding a couple more elements to this facility.


First up was a long warehouse or processing building near the covered loading building.  I selected a Pikestuff Prefab warehouse, 541-0004, for this structure.  With only a few doors and windows required, I made quick work of this building.


Warehouse or processing building for Neste Resins.


The second addition was loading racks for tanks cars.  I used the same Walthers kit for Borden Chemical at the other end of the Springfield complex.  The Walthers kit is for Four Modern Loading Racks, 933-4037.  A word of caution--this kit contains some small parts that likely will go flying at an inopportune moment, never to be seen again.  Fortunately, I had sprues for a spare rack so I could replace the missing parts.  


Neste Resins tank car loading racks.


The other structure I wished to add to my Neste Resins facility was one of two office buildings along the public perimeter of the facility.  The desired structure needed to be two stories high and roughly square.  I chose another Pikestuff building, the Modern 2 Story Office Building, 541-5002 for my model.  This retained the "family" appearance of the same steel siding and roofing used throughout the facility.  This structure proved my undoing.


Every once in a while, a project takes a nasty turn and stalls all progress.  Such was the case with this structure.  I hit a proverbial wall--a simulated steel soft plastic wall.  I needed to cut nineteen windows and three doors into the walls.  The soft plastic used by Pikestuff tends to fold back in behind the knife blade when making a cut.  Harder plastic is easier to cut than this material.  Over the past two months I would sit down to cut window openings, making three or four passes each direction in each cut.  After a frustrating and tiring session, I would look at my efforts and not detect any progress.  After a while, I just stopped trying.  Instead of working on another project, I just let it all sit. 


I have seen this phenomena off and on in the past.  I know that the cure is some new project to get me excited again.  That solution failed me for the past two months.  Perhaps the intense work on structures over the past six months led to project fatigue.  The lack of direct interaction with model railroad peers and hosting operating sessions certainly contributed.  Whatever, I just kept beating myself up by trying to cut those window openings.


Facing a month with no blog posts, I finally dug in and completed the required cuts and shaping of the window openings early this week.  I quickly moved on to assemble the walls.  Each wall consists of two pieces and those needed to be assembled into the basic box. When I looked at the resulting wall assembly the next morning, I immediately detected a fatal flaw.  The end walls were a different height than the side walls!  With the walls firmly joined, there was no hope for salvaging the project.  


The mismatched wall height issue was a new experience for me using Pikestuff materials.  All previous kits joined at the corners well.  A look at the inside walls reveals all wall sections have a score line at the same height above the base--about four scale feet up.  Clearly, these walls are meant to be part of the same system.  The tops do not match.  I laid out all of my window openings from the bottom of the walls, so even if I could have separated the corner joints, I would not have been able to salvage more than half of the walls--take your pick.  


Interior of my Pikestuff 2 Story Office Building.  Note the scribe line about four scale feet up from the bottom on both end and side walls.  Also note the height mismatch at the top of the corner.


I had other issues with my construction, so it is best to walk away from this construction attempt.  I may take a cue from the prototype to totally scratch-build the structure walls and roofs with different siding, roofing and roof pitch.  The other office complex to be built uses similar siding--what appears to be vertical grooved plywood panels.  I will report on what I build at some later date.  For now, I need to let this project go dormant and move on to something that returns excitement to my hobby activity.


Abandoned Pikestuff office building now serving as a placeholder.

Monday, August 31, 2020

NESTE RESINS-CHEMBOND -- 2

After a month's break, work resumed on the Neste Resins (Chembond) wood chemicals plant in Springfield, served off the Marcola Branch.  My first post described the history and significance of the wood chemicals industry, with two such plants represented on my railroad.  https://espeecascades.blogspot.com/2020/06/neste-resins-chembond-1.html
That first post described construction of the refinery core of the industry using a Walthers oil refinery as the basis.  My next step involved adding piping and tanks--lots of tanks.

I began this phase by assembling more of the piping spine that runs through the facility.  This major pipe run is elevated and shows prominently in both satellite and street views of the facility.  A Walthers refinery piping set (933-3114) provides a suitable selection of four-wide pipe runs with various 90-degree bend sections and vertical supports for the overhead run.  Using the satellite view as a guide, I assembled two pipe runs to bracket the intercooler pipe set that is part of the central refining facility.  


Looking down the central pipe run spine for Neste Resins.

Surrounding the pipe run and grouped off the ends of the two runs are several tank farms.  I needed to scratch-build these tanks, as nothing suitable was seen in model railroad catalogs.  I needed narrower diameter tanks.  Taking a cue from the Plastruct tanks I built as part of the refinery core (described in the first post), I built my tanks from sections of PVC pipe.  I used two diameters, roughly 1-inch and 1.5-inch.  I cut suitable lengths for 16, 20 and 22 scale-feet tall tanks.  I capped both ends, just as done with the earlier Plastruct tanks.  I scribed weld lines, just as I had done with those Plastruct tanks.  The several tank farms of the facility consumed close to sixty scratch built tanks.

Painting the tanks silver and then a subsequent coat of flat finish revealed the printing on the PVC pipes bleeding through the paint.  Ooops!  Fortunately, I had attached the tanks with rubber cement to the tank farm bases, so I could pull them up easily.  A fresh coat of automotive primer and then silver and finally flat finish yielded properly finished tanks.  

I mounted the tanks on sheets of styrene edged with 0.125 x 0.250-inch strip representing retention berms.  I needed to adjust my plan for tank placement several times based on limited space at one end of my model facility.  Indeed, one of my tank farm pads saw three rounds of surgery as I wrestled with creating a suitable scene that included space for an access road to the tight end of the facility.


The "tight end" of the Neste Resins facility.  I had to adjust my tank farm arrangements of the three major groupings at this end of the facility compared to the satellite view.  The end effect remains--a lot of tanks to support the process.

At the broad end of the facility, I added the first of several buildings seen in the satellite and street views.  I used a Pikestuff Yard Office (541-16) as a representation of a building alongside one of the tank clusters at the south end of the facility.  More Pikestuff buildings are planned, but I grew weary of cutting window and door openings in the soft plastic used for the building sides.  I will just keep working on it over time.


Neste Resins seen from the south end of the facility.

My model of Neste Resins is a work in process.  It is a large, sprawling facility with many different parts.  As such it will take time to build the component pieces.  Still, enough of the facility has been built now that it is very recognizable as a major chemical industry served by the railroad.

Monday, August 3, 2020

THE RAILROAD AT YEAR EIGHT

The beginning of August marks the anniversary of construction start on my SP Cascade Line.  I mark the occasion each year with a photo survey of the railroad.  Last year's survey may be viewed at: https://espeecascades.blogspot.com/2019/08/the-railroad-at-year-seven.html   One can work back from there in prior posts to see what I have accomplished over each of the past eight years.  While Year Seven represented a bit of a construction pause, this past year has seen considerable filling in of previously open space with terrain at Cascade Summit and Cruzatte and a major structure effort in Eugene and Springfield.  

While the outside world shutdown this spring and summer, my model railroad world has seen considerable visible progress.  The construction start anniversary was an appropriate time to very carefully reach out to the first small group of regular operators.  Five of us met to hold an afternoon gathering, mostly on our patio for "Show and Tell" with distance and masking protocols observed.  We eventually went into the basement for about an hour's worth of operations.  Trains were moved and cars switched in Eugene.  This was the first time anyone other than myself or my wife has seen the positive production produced by "Safer at Home" policies.

Follow along with the 02-EUOAY (Eugene to Oakland Manifest freight) as we travel the full extent of the mainline.  Along the way, we will see my limited operating crew productively doing what the railroad was designed for--moving (simulated) traffic!


Our journey begins at the Eugene Arrival-Departure Yard.  The turntable was installed this past Fall and approach tracks laid.  Temporary roundhouse and garden tracks help show what is yet to come.  Sharp eyes might even spot something else on a roundhouse track pointing to the eventual goal of an equipment era shift.


Properly masked, regular operator Rodger C. pulls the 02-EUOAY out of the Oakland departure track and across the new double slip switch onto what is now labelled the "West Main."  An operational check of the new track alignment is this area was a prime goal for this limited operating session.


Rodger C. proceeds past the Eugene Depot with the 02-EUOAY.  Several new structures fill what previously were blank spots along the wall.  The Eugene freight house is in the distance, beyond (left of) the Eugene depot.  Our locomotives are running alongside the Zellerbach Paper warehouse and are about to come alongside the mock-up for the Eugene Planing Mill.  


With the departure of the 02-EUOAY, Santa Clara Tower Operator Dave H. pulls a long string of cars out of the Arrival-Departure Yard as Eugene Yardmaster Craig L. watches.  Yet another route through the new trackwork received an operational test.


Later on, Yardmaster Craig L. works on that string of cars, classifying them for the several local freight jobs served by this yard.


Tom D. pulls one of those locals (made up by a previous yard shift) through Springfield on his way to Oakridge.  Some of the roofs of the new Rosboro Lumber complex are in the foreground and National Metallurgical is at center-right.


Back to the 02-EUOAY and Engineer Rodger C.  Here he is running the train past the Rosboro Lumber complex at the RR-West end of Springfield.


Swinging around the broad turn-back curve at the end of Springfield, our train passes the developing Neste Resins (Chembond) on the Marcola Branch.


Our train passes the Western Lumber mill at Westfir on its way to Oakridge.


In Oakridge, our train takes the habitual track for RR-Westbounds.  The train is broken in two and the helper locomotives are being inserted mid-train.


The 02-EUOAY leaves Oakridge and starts the climb toward the top of the Cascades, here crossing Salmon Creek.


Our train continues its climb, passing Montieth Rock.  This scene is much brighter thanks to a string of LED lights installed this past year.


The 02-EUOAY continues the climb through McCredie Springs and over Eagle Creek.


The climb continues through the mid-point siding at Wicopee.  Company structures and water towers--mostly an anachronism for our 1984 equipment--have appeared.


The 02-EUOAY crosses the Salt Creek Trestle--a signature scene on the railroad.


Our train crosses Noisy Creek Trestle and enters Cruzatte.


Terrain at Cruzatte was installed this past year and the company village now has the context of an isolated spot high in the Cascades.


The 02-EUOAY is strung out through Cruzatte and is approaching the third large steel viaduct--Shady Creek Trestle.


Our train exits Tunnel 5 and one of the signature rock and snow sheds that protect the tracks on the Cascade Line.


The 02-EUOAY passes the section gang housing at the RR-East end of Cascade Summit.


The helper locomotive set is pulled off at Cascade Summit near the water towers, Train Order Operator housing and station.  Terrain rises up behind the track, filling in a major gap on the railroad.


The 02-EUOAY has been put back together after removing the mid-train helpers and completes the journey by entering the RR-West staging at Crescent Lake.

Looking back on the past year, I am pleased to report accomplishments include installing the turntable and approach tracks in the middle of the reverse loop staging and arrival-departure yard at Eugene, adding quite a few structures in the Eugene and Springfield area, and nearly completing the base terrain forming with efforts at Cruzatte and Cascade Summit.  The railroad has industry to serve and mountains to climb.  I celebrated this construction anniversary by carefully hosting a small group of model railroad friends for the first time since March.  The railroad benefitted from the break in operations.  I just kept building structures through periods that otherwise would have been devoted to preparing the railroad for operating sessions.  It also benefitted from the clean-up and maintenance that prepared for this anniversary.  Finally, the new trackwork received its first operating test by folk other than me, the builder.  Onward!


Saturday, July 25, 2020

EUGENE ARRIVAL-DEPARTURE YARD TRACK CHANGE

With the sustained down-time of this Spring and Summer (no operating sessions), I finally tackled a long-planned track arrangement change in the Santa Clara Tower throat complex (Eugene Arrival-Departure Yard).  Comments made by two of my professional railroaders during the first operating session on the full mainline in June, 2015, caused me to reconsider and then redesign the throat track arrangement for Santa Clara Tower.  This throat area is the space between the RR-East end of the Eugene Depot and Classification Yard and the reverse loop staging yard which serves as the Arrival-Departure Yard. 

My original track arrangement necked down the mainline and WP Siding from the depot area to a single track main.  This single main split to access both ends of the reverse loop.  A short section of additional track provided an auxiliary "East Main" in the original formulation that accessed only the five reverse tracks closest to the wall on the "right hand" side of the loop.  


Original Santa Clara Tower track arrangement.  Only A-D Tracks 1-5 and the Halsey Branch can access the "East Main"--the right-hand track in the foreground.  All other tracks had to use the original mainline which splits at the throat switch in the middle foreground.

My professional railroader's comments about "extending the WP Siding" lit an "understanding light bulb" in my brain immediately.  I had been staring at Ed Austin's Eugene track diagram in his and Tom Dill's Southern Pacific in Oregonbook (PFM, 1987) for a couple of decades, but only by that comment did I understand what SP had done with track in the Eugene terminal.  Starting at the RR-West switch just beyond (geo-south) for the Eugene Depot, the WP Siding extended as an additional track with several crossovers all the way out to Irving--the RR-East end of the Eugene terminal.  What I had missed was the flexibility that additional track gave to the entire terminal.  Trains, switch moves, and light engines (often returning helpers) could use either track past the depot to get to their destination within the terminal complex.

Studying my existing track, I recognized I could never achieve the complete solution which would have involved two tracks accessing all tracks in my reverse loop area.  I could, however, achieve most of the benefits by providing full access to the "right-hand" switch ladder, adding A-D Tracks 6-12 to the connection to the "East Main."  This could be achieved by replacing the single switch that connected either the "throat switch" and the nominal main or the "East Main" with a double slip switch.  Continuing RR-westward toward the depot, the rest of the project requires three more double slip switches to create two "main" tracks extending from the depot to the Arrival-Departure Yard.

Double slip switches are something to be considered VERY carefully.  They are complicated bits of moving track.  Further, their routing is not intuitive, even to experienced railroaders.  They are known as "puzzle switches" for good reason.  One can think of a double slip switch as two opposite acting switches jammed together in the same space.  The points controlling the pair of routes on the right side of the switch are located on the left side of the frogs.  

I knew by the summer of 2015 that I needed to install four double slip switches to achieve the desired track rearrangement.  At the National Train Show at the end of the NMRA Convention in Portland (PDX2015) that year, I sat down with the folk from Fast Tracks to order assembly tooling for a Number 8 double slip switch.  My mainline switch standard is a Number 8 so that seemed the right way to go.  Unstated at that time, though, was that a Number 8 double slip switch needs moving frogs.  No instructions for such an arrangement were forthcoming and such an arrangement screams mechanical complexity.  When I discovered that fact a year ago as I was getting serious about this project, I decided I needed to take a fresh look at my options.  I settled on Peco SL-U8363 Number 6 double slip switches.  My track arrangement was adaptable to the sharper frog angle.

With the first of my Peco double slip switches in hand, I began laying out the revised yard tracks.  I am happy to report the Peco Number 6 fits my track arrangement very well.  I decided the overall project logically fell into two phases.  The first phase involves the installation of a single double slip switch to provide full access to the "right-hand" side of the reverse loop Arrival-Departure Yard.  As operations on my railroad have developed, this is the westbound departure end of the reverse loop.  As a consequence, all of the tracks in the throat area are being re-named to reflect their actual uses.  What had been called the "East Main" is now the "West Main."  The former "Main" becomes the "East Main."

With no operating sessions in sight and having all of the materials I needed, I began the rework by removing the old "throat" switch and the switch for the old "East Main."  I also removed the switches for tracks 6 and 7, as the new alignment would focus on Track 6 instead of 7.  For the past five years, I thought I would continue the compounding switch arrangement for Tracks 6 and 7 I originally built, but as I began removing track, I realized I had a far better option.  I could begin the switch ladder with a left-hand switch breaking off of the Track 6 alignment and then have all right-hand switches in the switch ladder.  This is what a full-sized railroad would do.  I also discovered I could add a connecting track to the engine lead, previously accessed only from the left-hand side of the reverse loop.  This new connecting track provides a West engine lead.


Removing the old track helped open my eyes to a better track arrangement than originally envisioned.   This view shows the original location and alignment of the switch for Track 7.  This switch was removed and replaced in the final design.

As I began placing the new switches, location of switch throwbars was a concern with regard to benchwork stringers under the roadbed.  I drilled exploratory holes on the prospective throwbar locations and then stuck bamboo skewers through the holes.  Sure enough, one switch needed to be moved a bit to provide adequate clearance from an underlying benchwork stringer.  


Bamboo skewers inserted in exploratory holes for throwbar locations.  The skewer and hole on the right was a bit too close for comfort to an underlying benchwork stringer.  Fortunately, I could move this switch closer to the double slip switch to clear the nearby support.


Final track arrangement.  Note the double slip switch has a straight-through route connecting the new "West Main" to the alignment of Track 6.

Wiring the new track arrangement was both straight-forward and frustrating.  First, the double slip switch was very easy to wire.  Peco provides feeders for the two frogs and the outside rails.  The outside rails are electrically connected to the correct rail segments within the switch.  A simple wiring diagram is provided on the packaging.  I re-purposed the switch machines for the former "throat" switch and the former "East Main" switch.  Similarly, I moved the switch machines for Tracks 6 and 7.  New switch machines were required for the two ends of the new West Engine Lead.  

The wiring frustration came first from trying to reuse as many track feeders as I could.  This saved on making more solder joints to the track bus wires--a process for me that requires using my resistance soldering rig.  Beyond that, it was a matter of locating the correct pair of bus wires under this very complicated throat area--lots of wires for a variety of track segments.  Finally, getting the frog polarity connections right resulted in the one for Track 6 needing to be reversed--something I discovered with the first test train.  

I rearranged toggle switches on the control panels for Santa Clara Tower.  Two toggle switches had to be moved and another one added.  The track lines were redrawn.  I chose to activate the engine lead switch closest to the engine facility as part of a crossover from the switch off the new East Main.  This saved one toggle switch.  Although the pair of toggle switches for controlling the double slip switch appear "logical" to me, I know these controls will remain a puzzle for many.  I augmented the toggle handle directions with light emitting diodes (LED) to indicate the route selected through the double slip switch.  Following color conventions on my railroad, the RR-East side uses blue LEDs and the RR-West side uses amber LEDs.  My long-term plan for this panel will replace the toggle switches with pushbuttons for two-button (Entrance and Exit) control.


Modified control panel for the "Westbound" end of the Arrival-Departure Yard.  

Finally, it was time to run the first train or cut of cars through the new switches.  This is when I discovered the reversed polarity of the frog connection for Track 6.  That was an easy fix.  This new track arrangement awaits testing by some of my regular crewmembers.  Once I pass that test, I will consider doing the second phase of this overall project, with three more double slip switches.  For now, I am happy to at last provide an alternative access to the full RR-West end of the Departure Yard.  A bonus was providing a path from this West end trackage to the engine facility.


First train (cut of cars and locomotive) crossing the new double slip switch.